What does the API Key/Token do?
Adding a ReCharge API Token to the RetentionEngine Builder is the first step to connecting RetentionEngine to your ReCharge store.
The API Key allows the RetentionEngine to automatically update customer accounts with discounts, pauses, or cancellations.
Creating the API Token in ReCharge
Step One
Log into your Shopify admin panel and open the ReCharge App.

Step Two
Click on the "Integrations" tab and click "API tokens..."
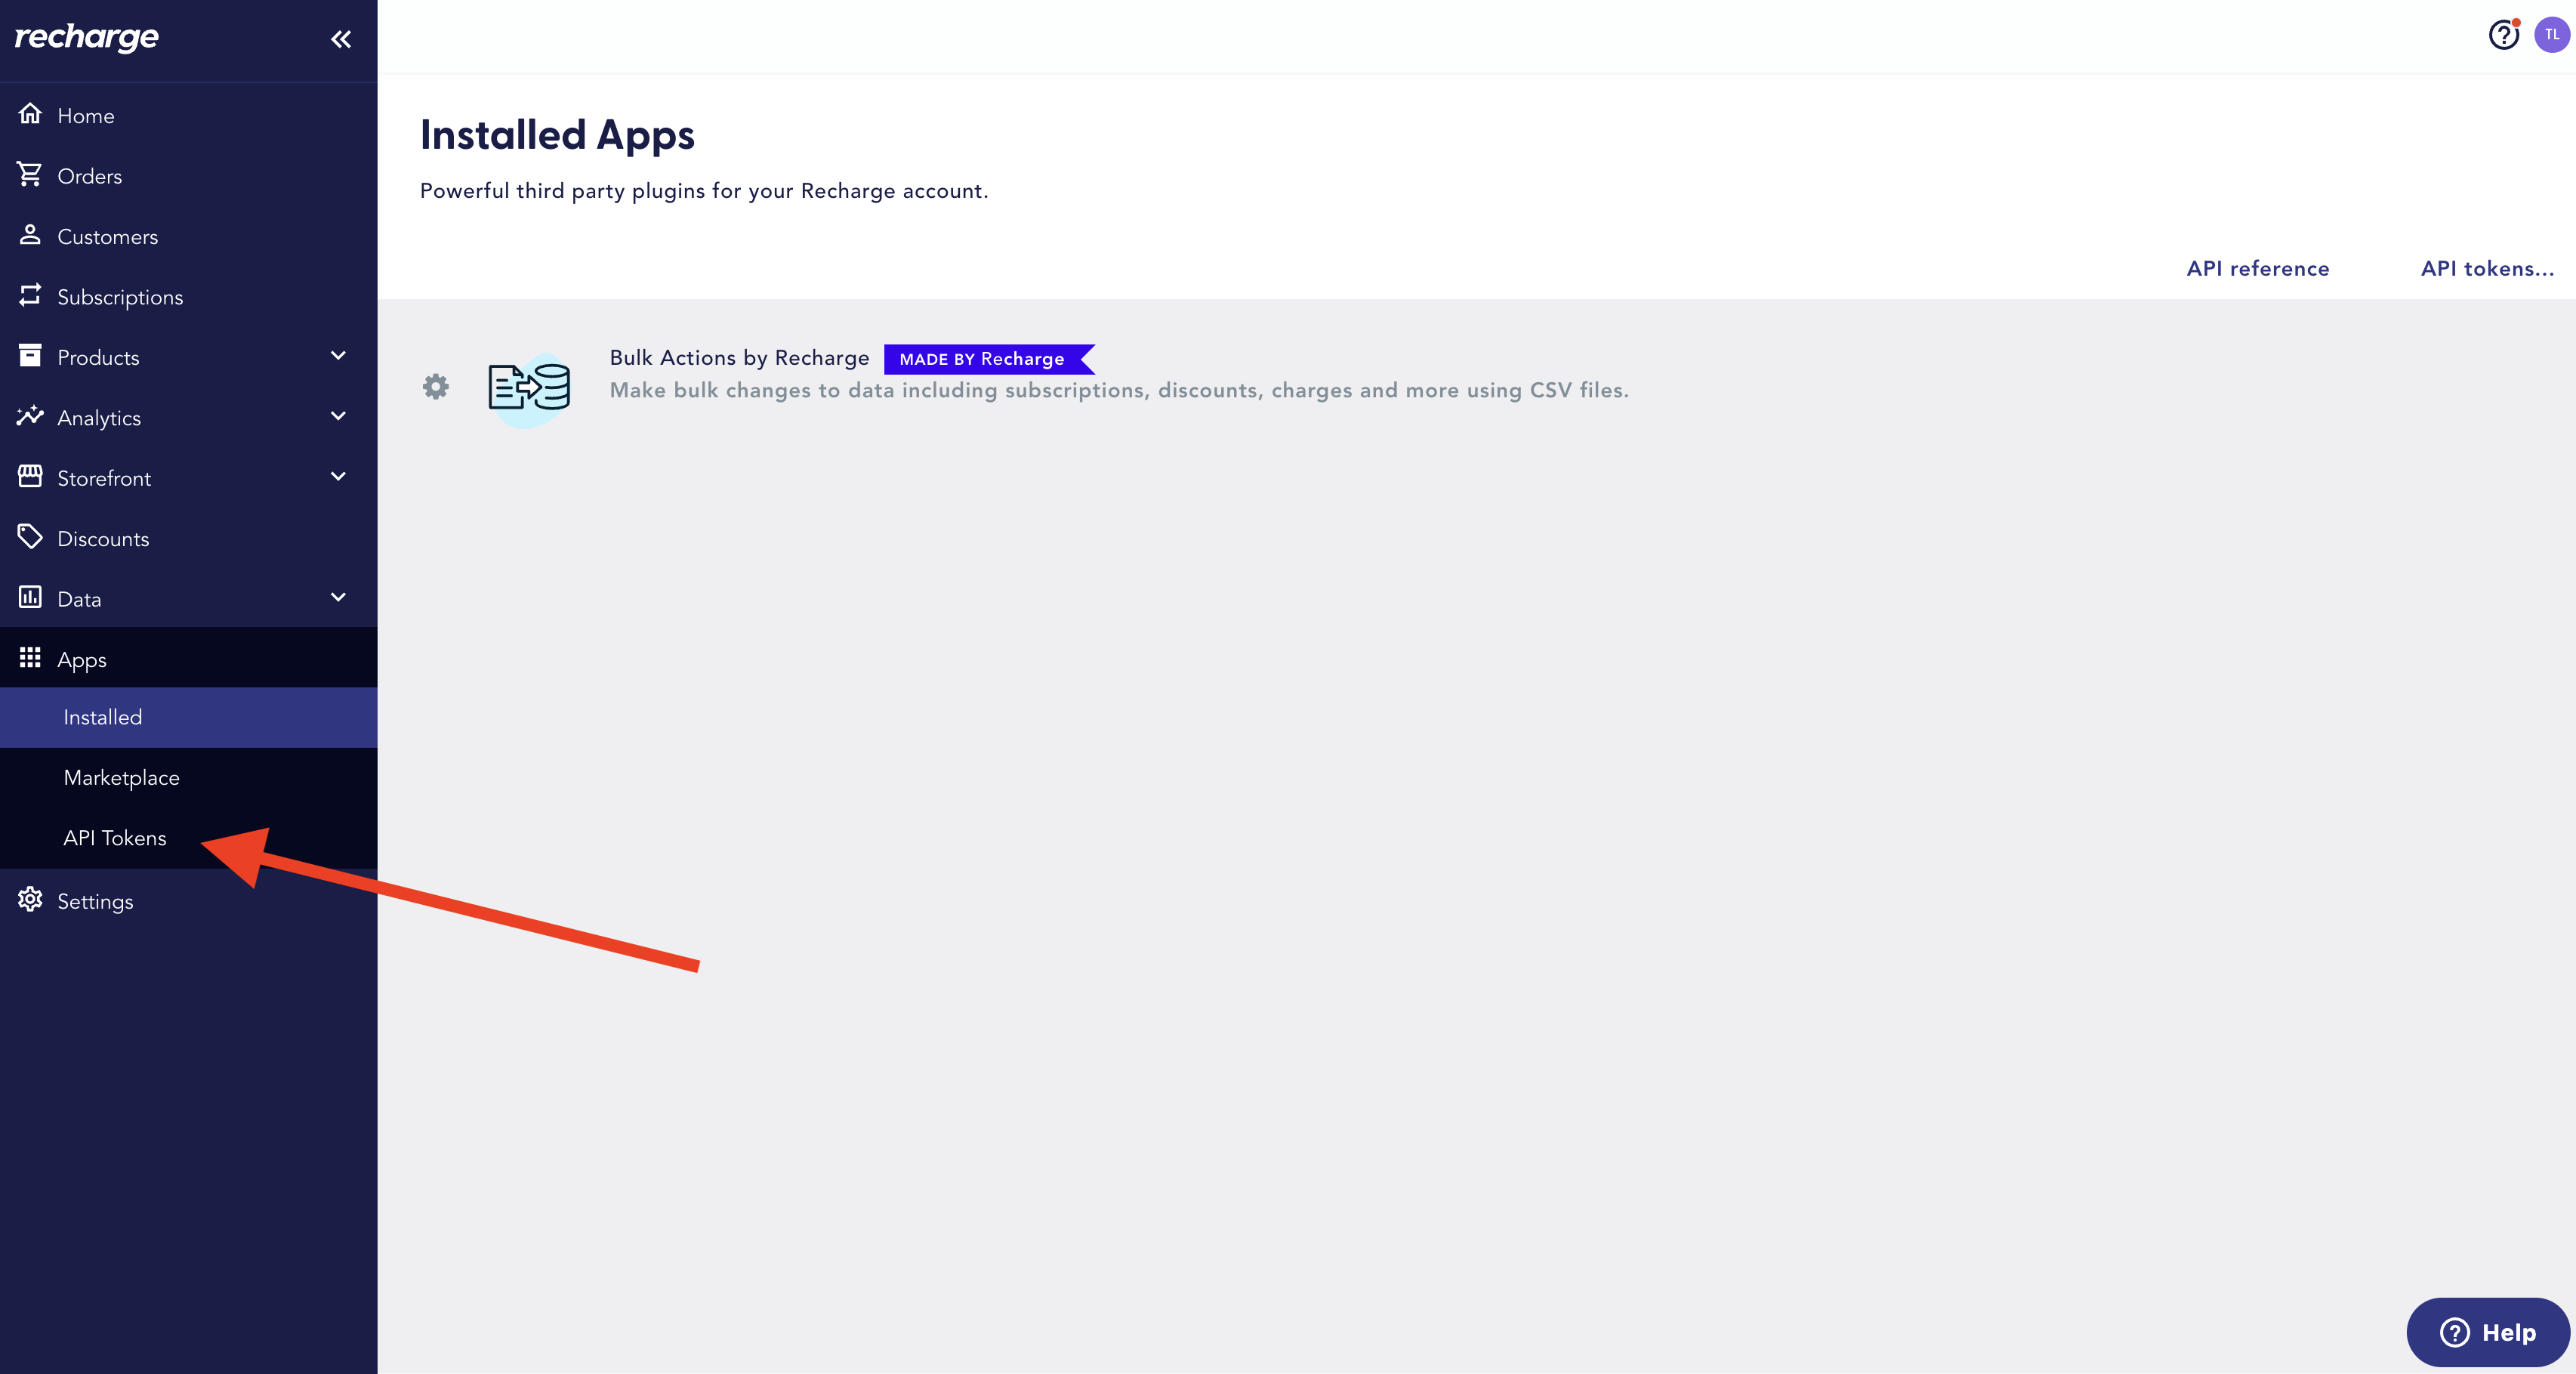
If you don't see this option in the upper right corner, you'll need to reach out to ReCharge's support team to enable this for you. Send a support email to ReCharge and they will quickly get this added for you.
Step Three
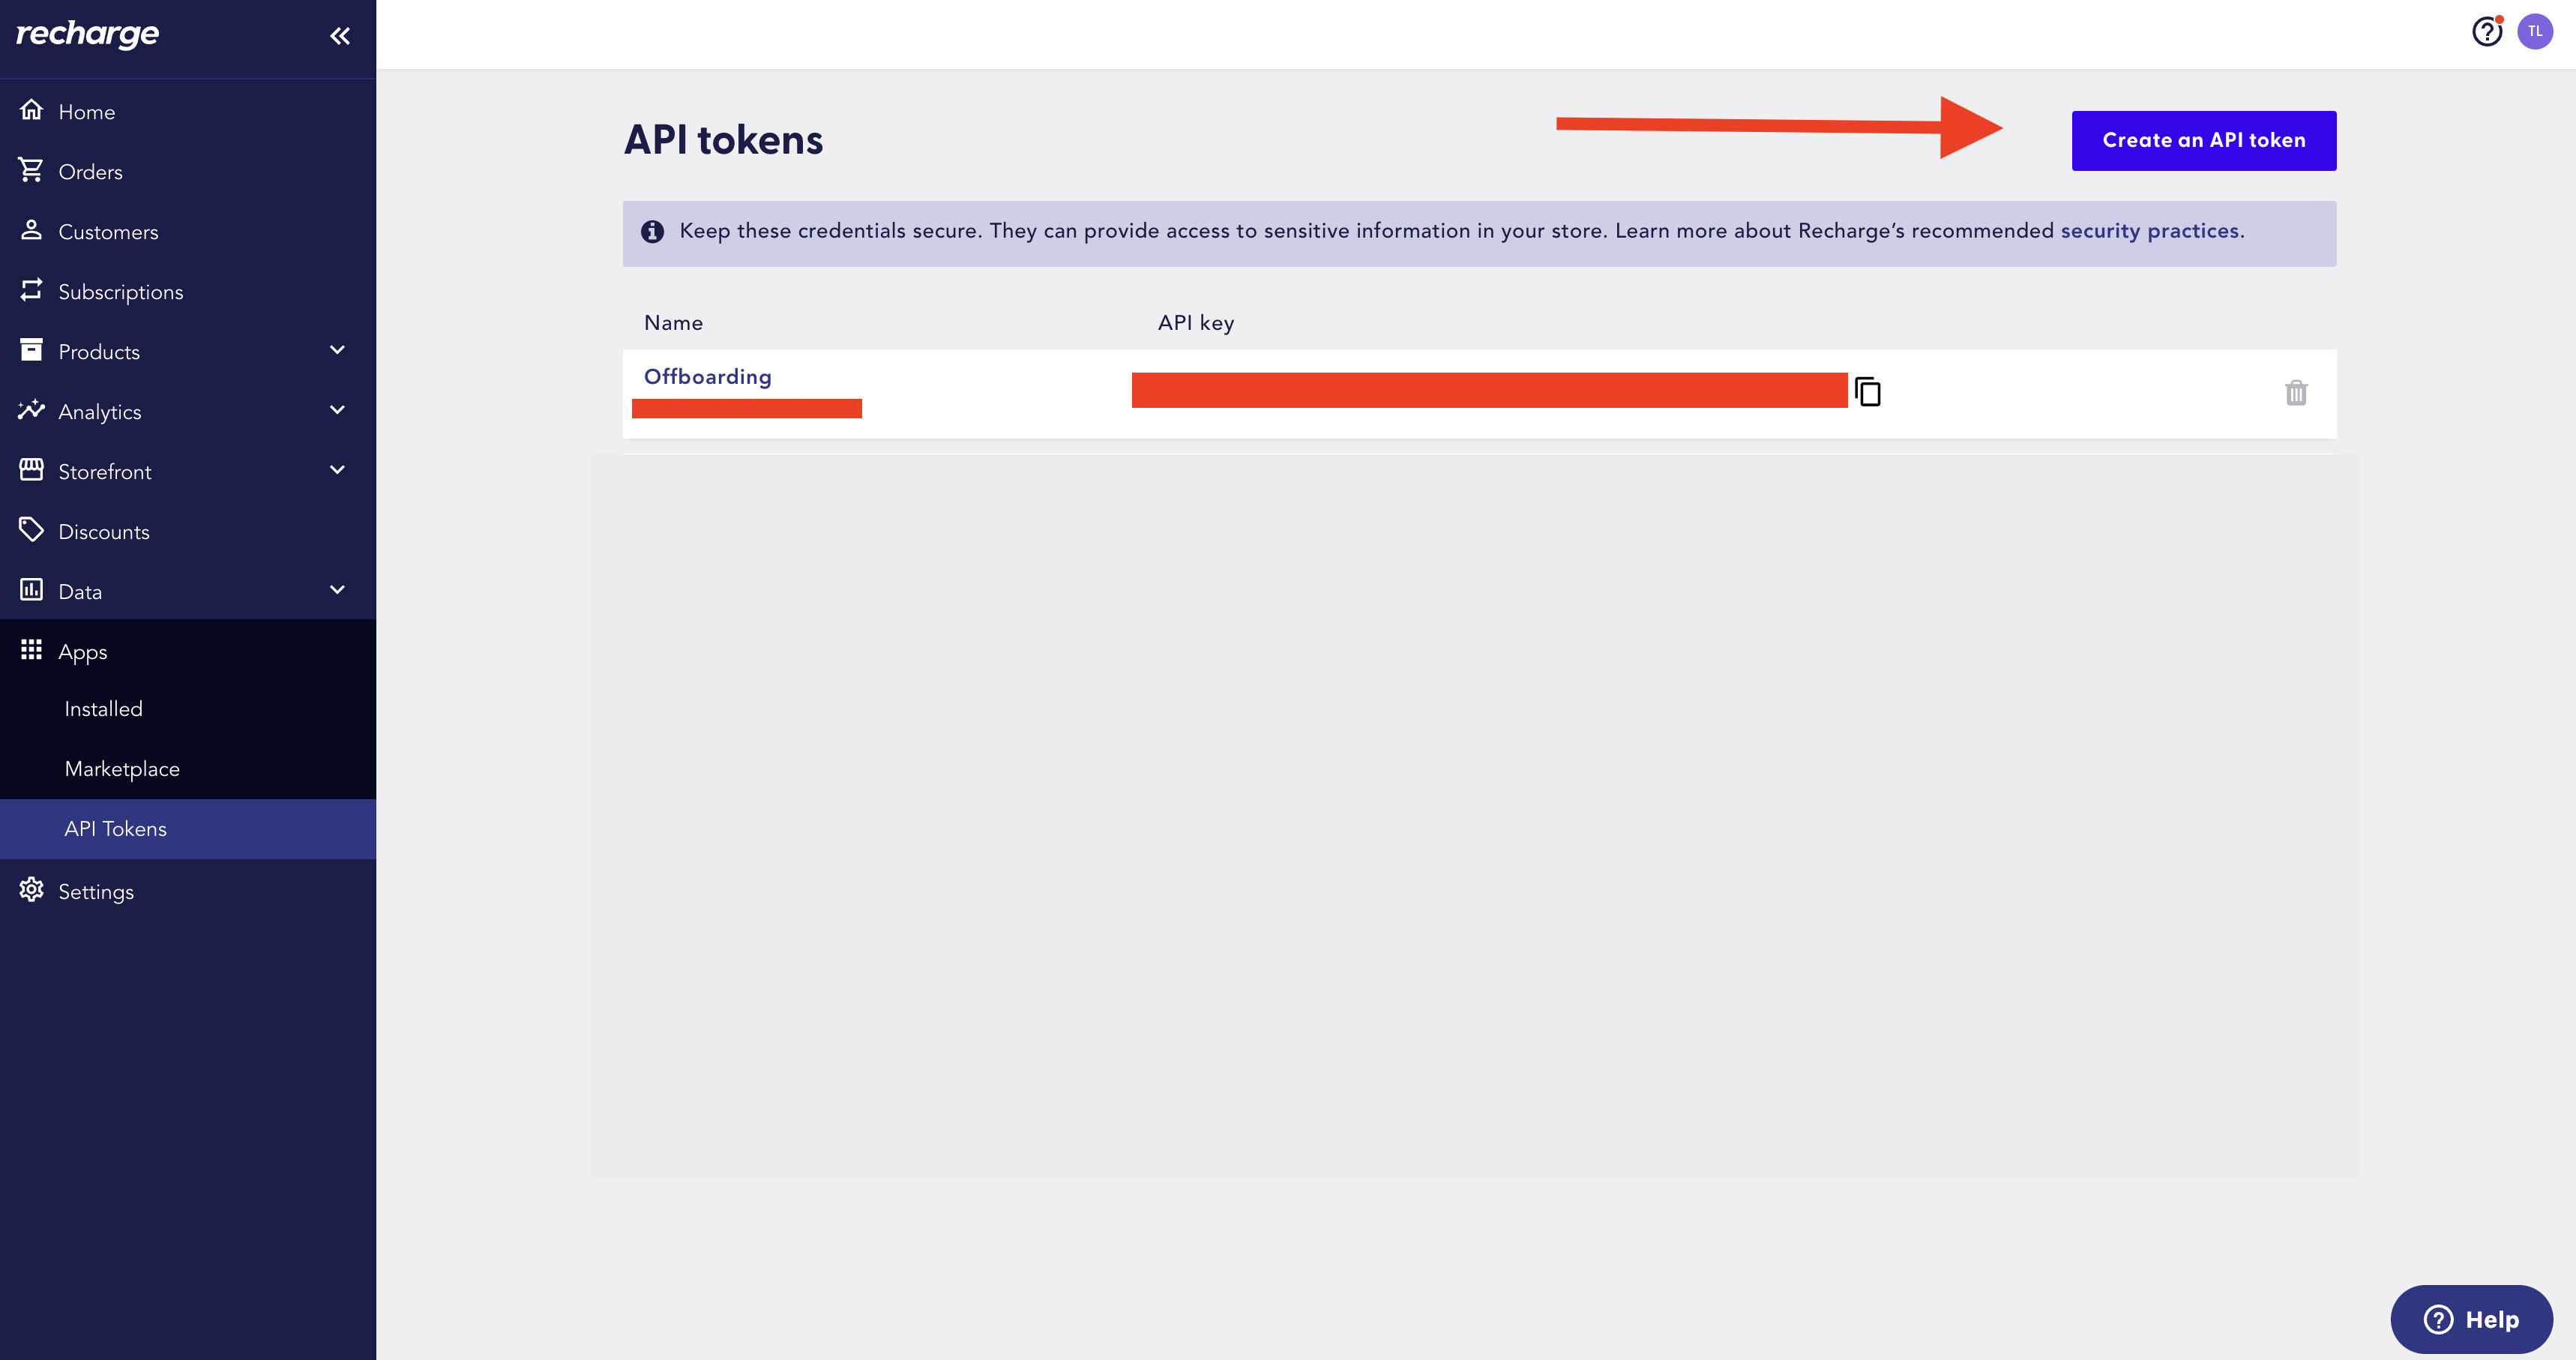
A. Click on "Create an API token"
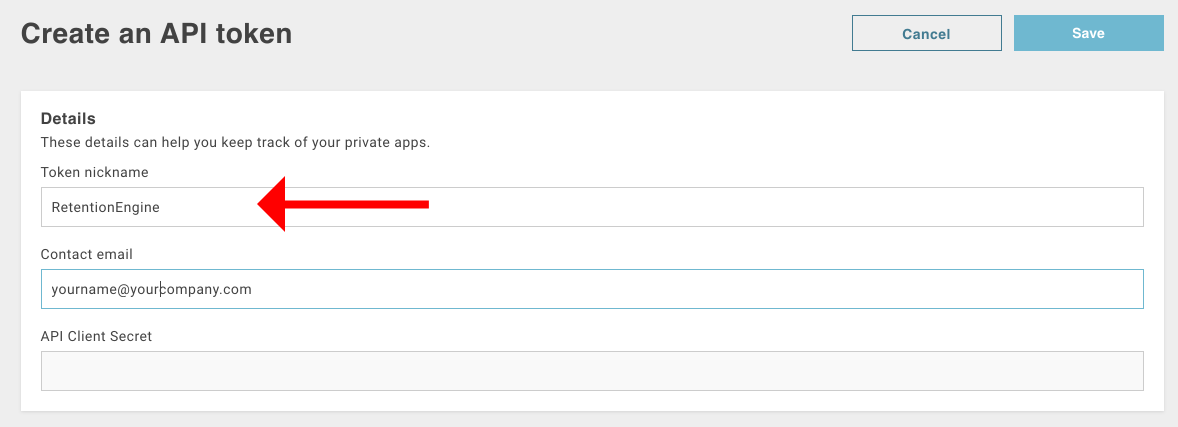
B. Set your Token Nickname to "RetentionEngine"
C. Make sure to also set the permissions as instructed below:
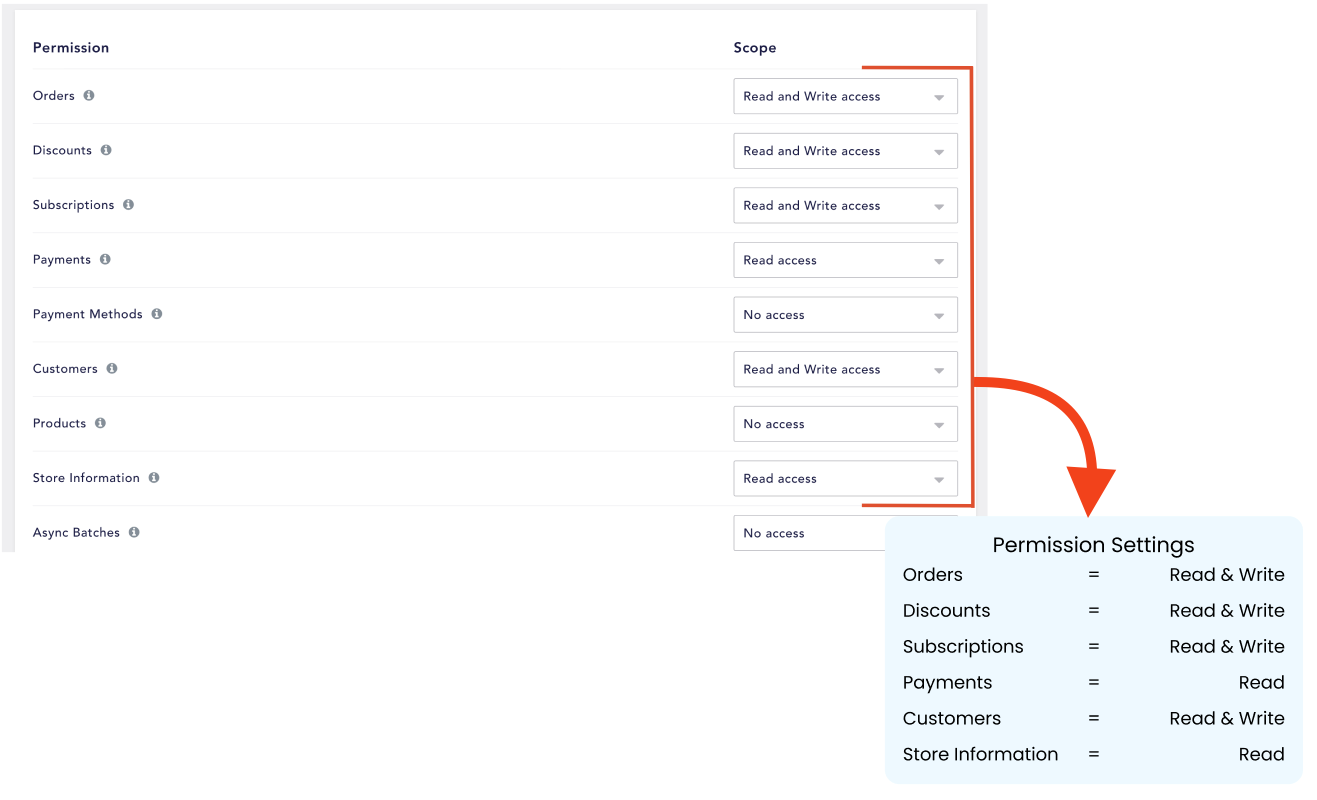
If your permissions don't match above, your API Token will not work. Please make sure you have editted the permissions for ONLY the following:
- Orders: Read & Write access
- Discounts: Read & Write access
- Subscriptions: Read & Write access
- Payments: Read access
- Customers: Read & Write access
- Store Information: Read access
Pasting the API Token into the RetentionEngine Builder
Step Four
Copy the ReCharge API token....
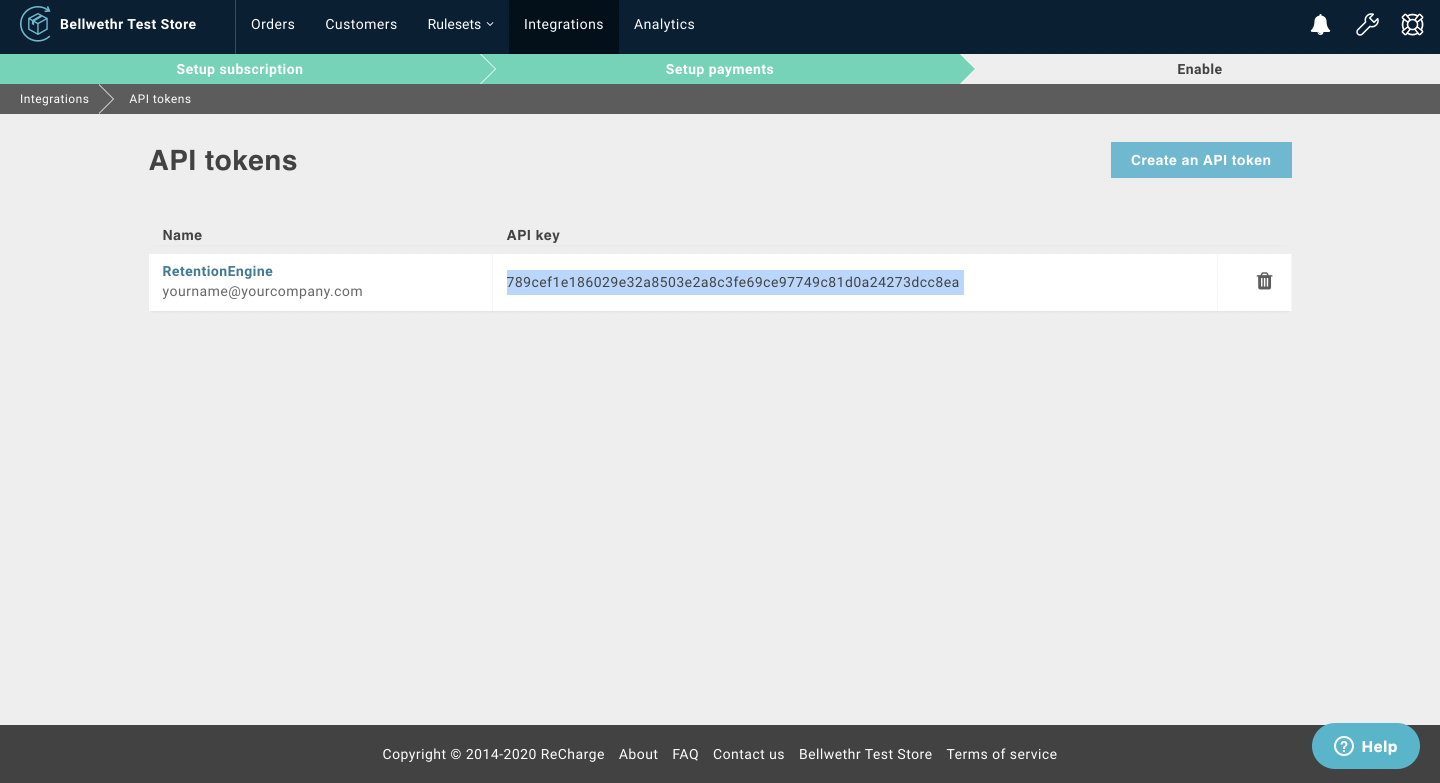
....and return to the RetentionEngine builder:
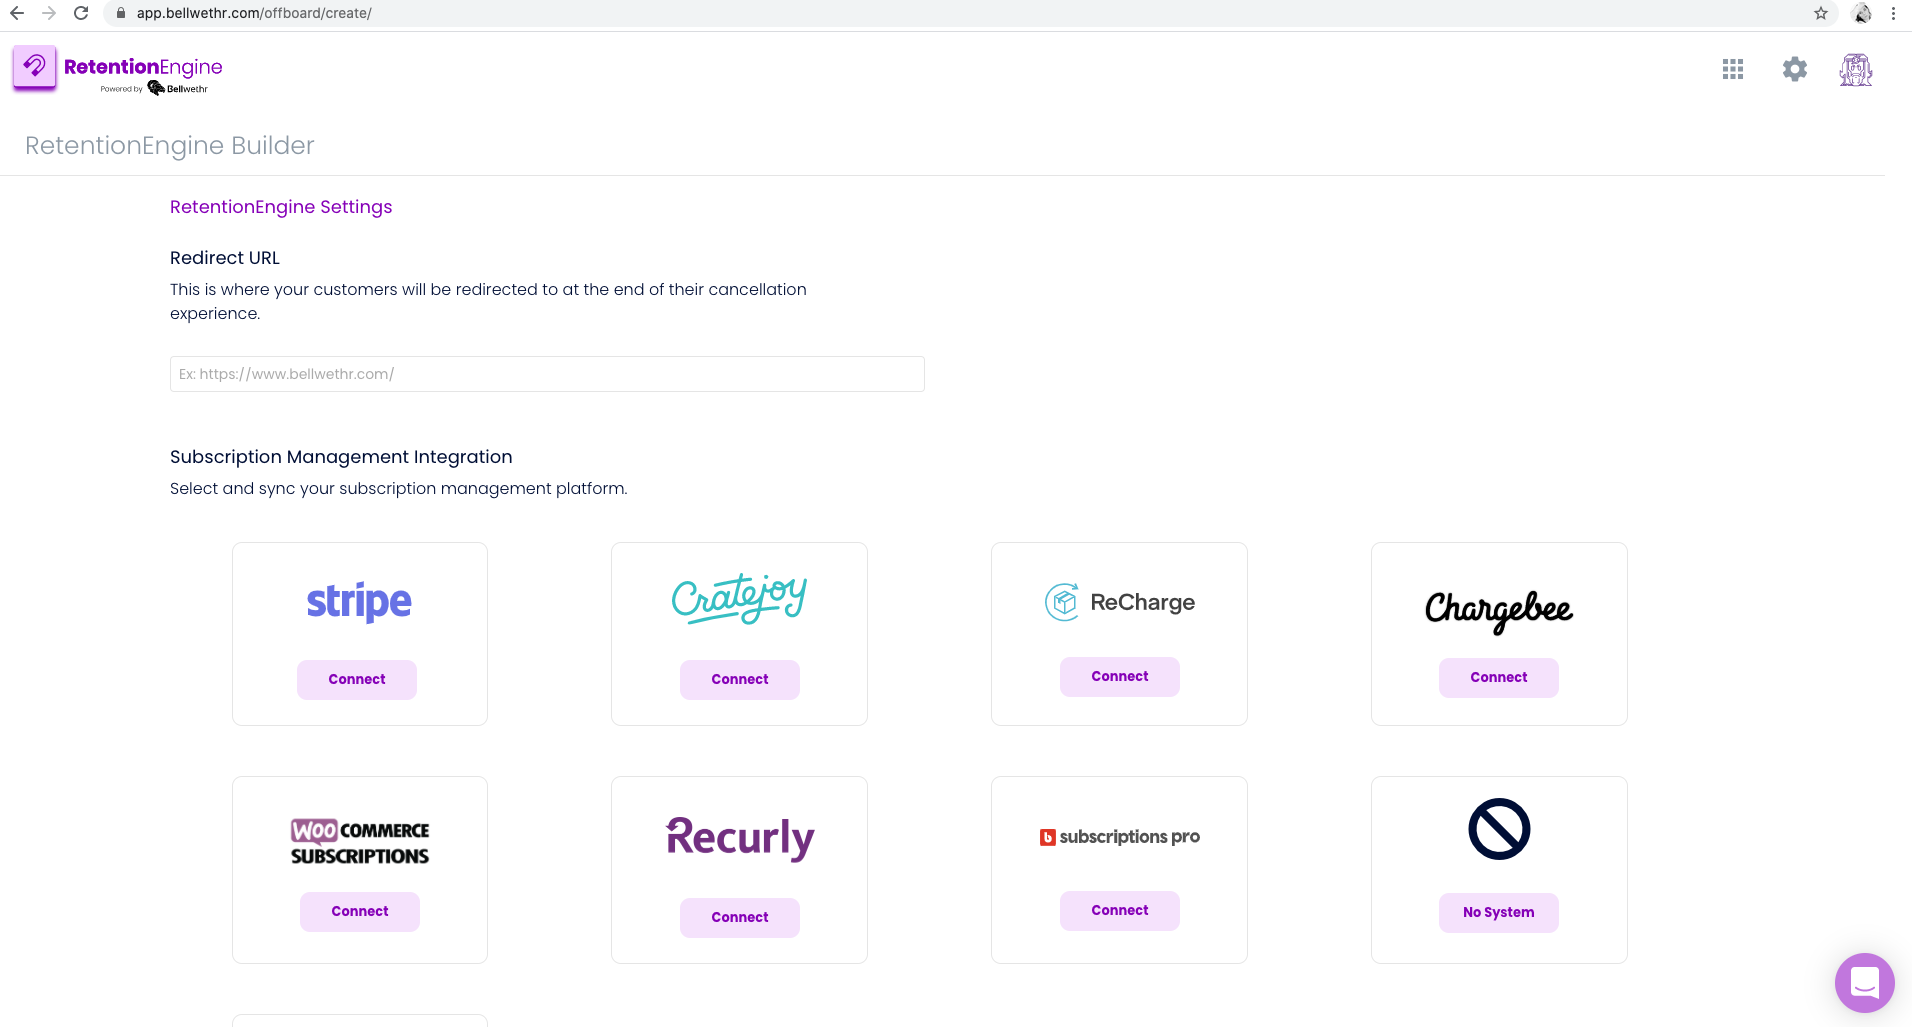
Step Five
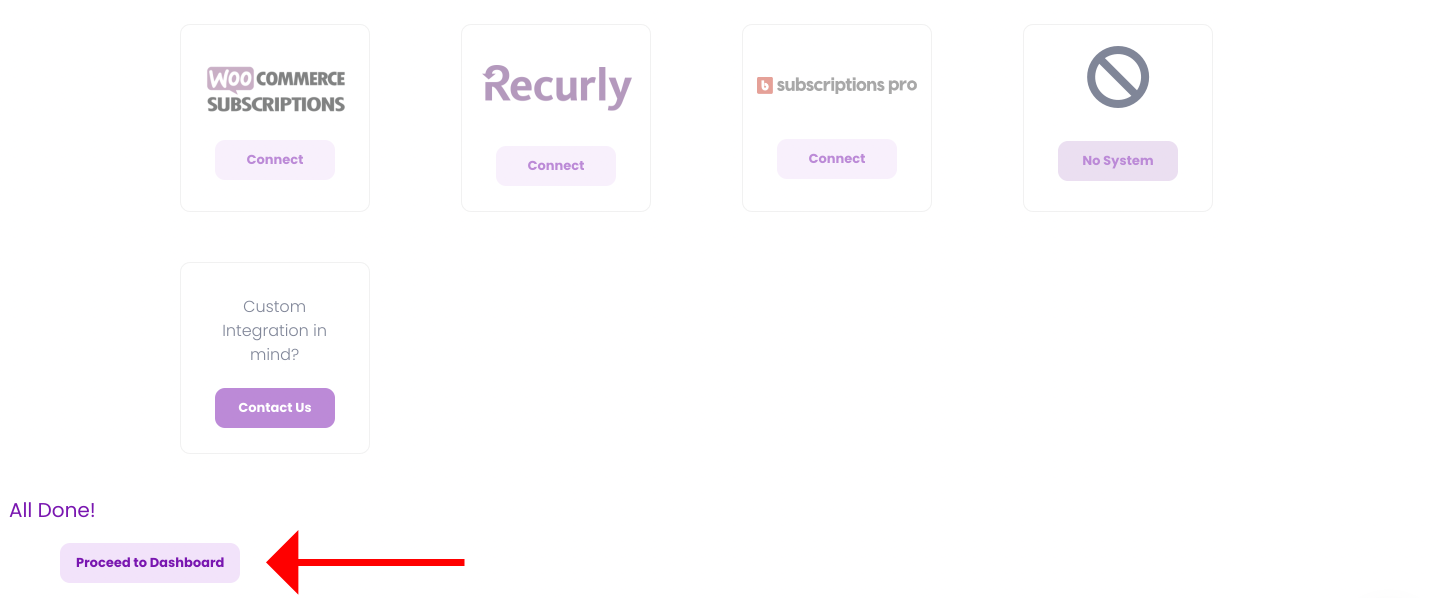
Choose ReCharge as your billing system integration and paste the ReCharge API Key.
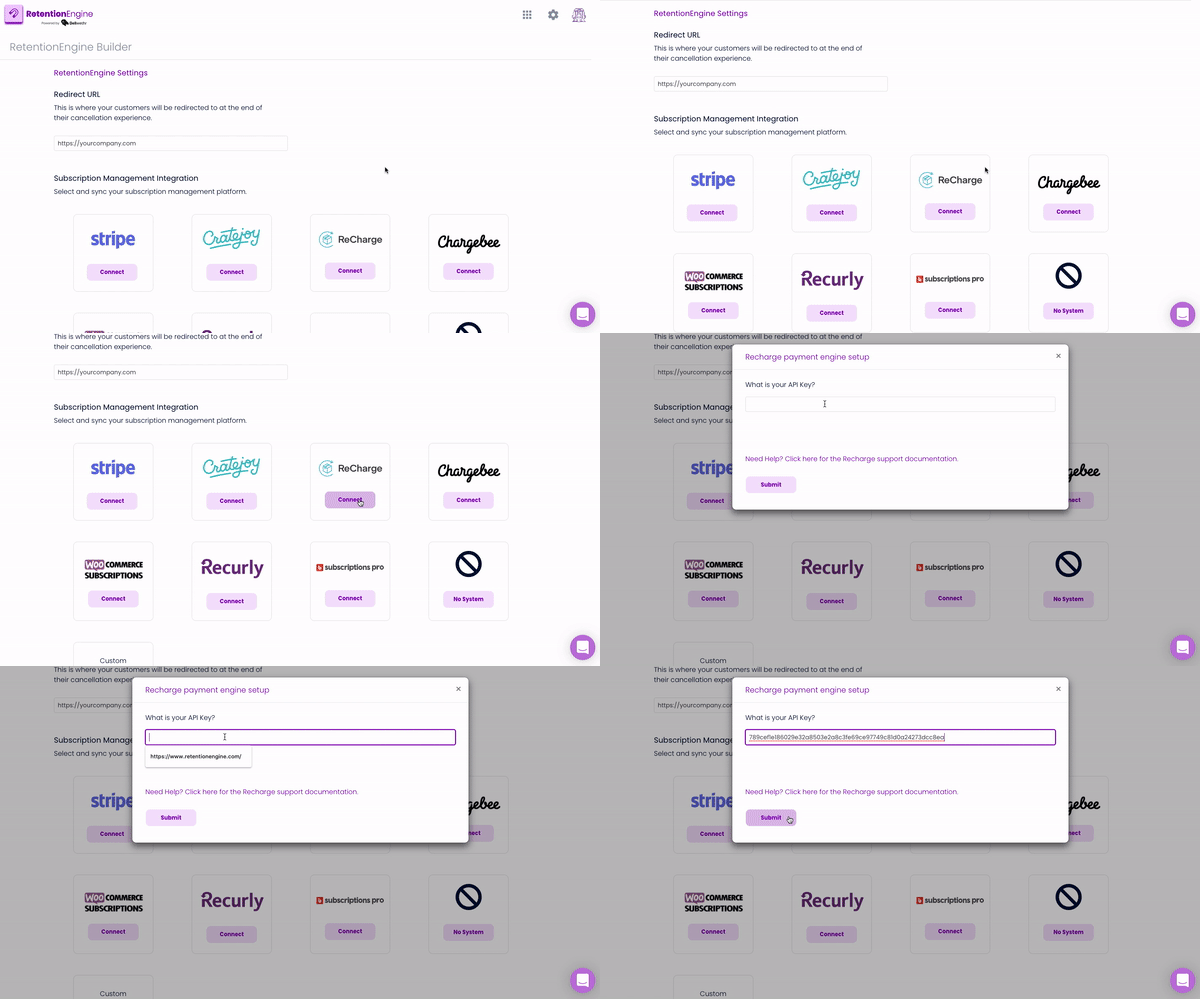
Once those fields are pasted, you're API Key has been added, and you can continue to the RetentionEngine Dashboard!
